
Hello all.
As i'm whittling away on my drawing board, i rarely take the time to take proper records of the pieces as i work on them. Recently, Andy Winter, writer of Hero Killers (which i'm sure has been mentioned here once or twice) asked if i could do a cover for his new project. Of course, i'm always happy to do something for Andy, so i got crackin'. Reckoned i'd use this as an opportunity to show the process of how i work.
 Well, first i did a sketch of what i thought what would be a cool cover. The story is about a London vampire, so i wanted to show the character, looking cool, in an urban environment. I thought if i showed her licking (a victim's?) blood off her fingers (thought it might be sexy or somethin) while standing in front of a wall with lots of posters, that'd do the job. I did some sketches of different ideas, but the more i worked on them, the more i realised the first pass was the best.
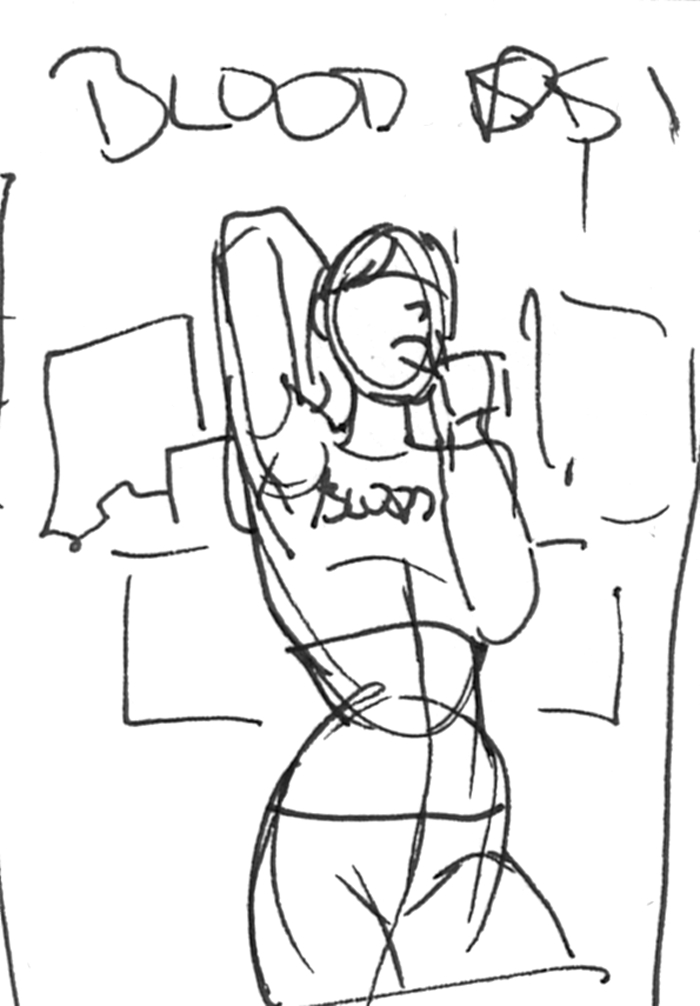 I sent the sketch to Andy and he approved, so i did a very basic sketch, changing the pose somewhat (Andy asked for it to be REALLY sexy) and figuring out better how to lay the composition on the page.
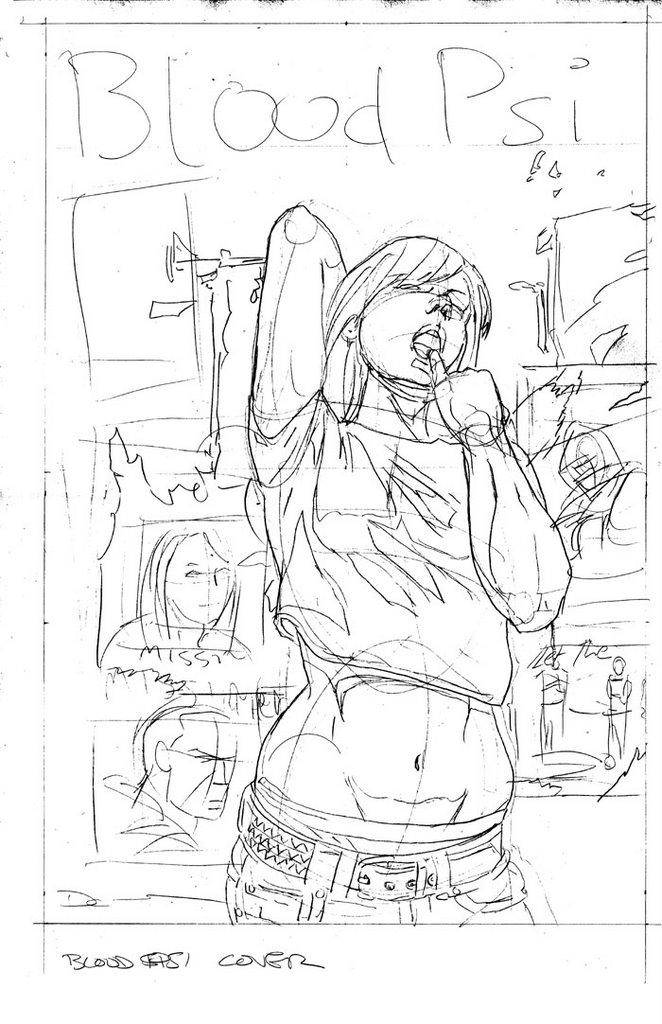 Then i layed out the image on the page, laying down most of the basic linework for the main character and figuring out where to place the posters . This is always really tricky. If you get something wrong at this stage and don't fix it then it'll be too late down the line. After this stage the drawing gets too worked on to fix any mistakes easily.
So once all the important information was down on the page, i tightened up the image, finishing details, fleshing out the face, worked out the blood pattern on the arm, finished the poster images and added some paint scrapes and graffitti to the wall. In the pencils i always try to work out where my blacks will go. You can never be 100% sure how it'll turn out, but you get a basic idea.
After i finished the pencils, i took my pens and went over the image, filling in little details like eyes and scrapes with my smallest, and
 bigger information with my larger ones. I took a brush pen and made a heavier line weight around the main character and at the bottom of some of the posters. At the end, i'm left with all the line
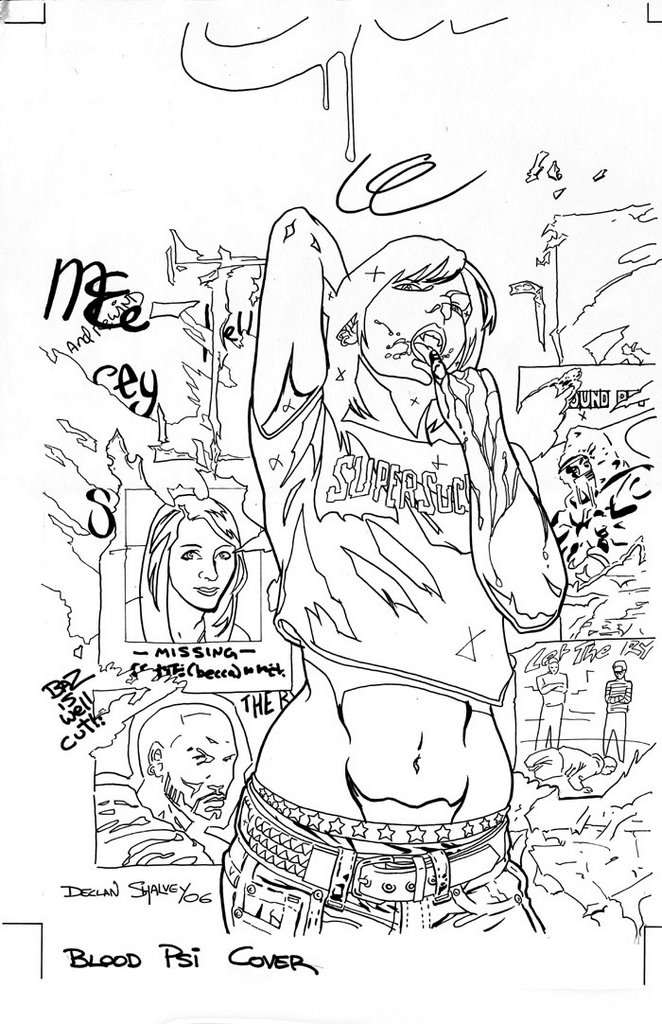 work taken care of, leaving my favourite bit:
 Filling in the blacks. I love, love, LOVE black on the page. When i go over the image with the ink-filled brush, the whole piece 'pops' for me. I filled in all the parts i marked to be filled, but i wasn't fully happy. I had a lot of information on the page and i thought i needed to do something, to relax the eye. So i decided to add some shadow to the top and bottom of the right side of the page. Nothing mad, i just needed to balance it out a bit, if that makes sense.
So, that's it. Cover finished. Or is it? I'm gonna colour this piece too, doing a step by step job like i did here. I normally just tear through a page, just trying to get it done. I rarely scan a piece midway. Mainly cuz of laziness, but also, it takes time to stop and scan, where i'm usually too impatient and just wasnt to finish the piece. If anyone would like to see me do this more often, let me know, otherwise i probably won't bother.
Back in a couple of days with the colours.
dec.
3 comments:
This process is great to see, you should do it more often, I always love seeing how something forms. Can't wait to see the coloured version.
-Ruth
Ahhh man. Id swap my eighty dolloes for that!!!
Hey i'm a good friend of the model. i'd just like to say what a fantastic job you did, i mean phenomenal! can't wait to see the final piece
Post a Comment